Thursday, October 19, 2017

Maker Space


Even our small town has what is called a Maker Space.   I have been driving by ours for years.   They have a sign, they have some model rockets hanging from the window.   I just figured it was some kinda hobby store.  Frankly, I was worried if I went in there I would be assaulted by scrapbookers.  I hate scrapbookers!  So I have driven past.   

It wasn’t until this past Sunday night I had ever given it a second thought.   Talking to The Wife, who is Scoutmaster for one of our town’s Boy Scout troops.   She and her committee are always looking for activities for the scouts to do and it was suggested there was a real nice woodworking class taught in The Maker Space.  I asked her, “They have a shop available there?” she whipped out her trusty Scoutmaster iPhone and gave me the full list of tools they have.   …And I mean to tell you, it was full.  The light went on in my head and I realized what these places really are.

Two nice table saws with full outfeed tables.

During my workday yesterday while in the process of waiting for something to finish happening, I did a little research.   My big city has two such places.  Both of them advertise their laser cutter ownership.   One of the web sites did have a notice posted saying the laser cutter was broken.  There were no pictures on the broken laser cutter place, but there was on the other.   The place looked huge and extensive.   Both places offer tours on specific nights and tonight was the night for the broken laser place.

It took me about an fifteen minute drive via mostly freeway to get to the place.   It is located within a small (~five square city blocks) older, industrial development inside a very desirable neighborhood on the south side.  Just exactly the type of thing that never works out if you are playing Sim City, and yet here it is working in real life.  —Who’da thought. 

This Maker Space is a older, single story building.   It looked a little rough on the outside. I walked in and the tour began.  Inside the front door the seedy 1950s era offices are hoped to one day become a computer lab.  —They had a ways to go.  In the corner there is a ham radio station. The basement is an art area with some big tables, drafting table etc.  I noticed a 3D printer.  A sewing room with a dozen vintages of machines.  There were a couple of other areas like this, I can’t remember it all.   

The reason I am really here.  Critical to the
building of a tabletop!

Then upstairs.  Walking into the shop it was split into four bays.   Maybe eight thousand square feet total.  One bay was storage where I would be able to keep a plastic tote nine of materials.  One bay was a welding shop.  One bay a machine shop with three metal lathes (one of which my guide guaranteed worked.) two vertical mills.  One of the mills was named Bridget. :-D Metal band saw, bending equipment, etc.   I don’t know that stuff well so maybe I am easy to impress.  I thought it looked good.   

Then the wood shop.   Two big table saws with full out-feed tables.   A nice looking Jet jointer (the tool that actually set off this search for shop space) along with a wide planer and two smallish lathes.  They had a CNC machine that was currently broken down.   I don’t even know what that is, I am just passing on what they told me.   They didn’t have a wide sander, which would have been a really cool thing for one of my planned tasks.  Otherwise it seemed like a very well decked out shop.  

The wood shop equipment was the newest in appearance the table saws in particular.  The other equipment, to me, looked pretty old.   But stuff looked well maintained.   My tour guide described the place as like a big crazy extended family.   It is volunteer run.  It sounds like some members are around a lot.

The welding shop.

Here is what really seals the deal for me.   This Maker Space is $55 a month, 24/7 building access.  The other place with all the nice pictures on their web site is $200 a month, three month minimum commitment.   Not a job shop.  I really can’t afford to spend that kind of money.   I don’t need high tech stuff to build a table and a few other custom van parts.  I really *wish* this was a drive-in shop so I could get the van inside for some of my stuff but the expensive place doesn't have that ability either. 

I think I will sign up and meet with the shop foreman next week.  Before I can work I have to attend an orientation. He wants to show me where everything is, and also I am sure, confirm that I am a low risk hazard for myself or his shop.


Ok and here is another aspect to the whole shop.  It is the corner lot of an industrial dead end street set in the middle of a nice safe south side of town residential block.  A place where a cargo van would be totally invisible.   Interesting.

Tuesday, October 17, 2017

Its Always the Little Things


Converting a cargo van to stealth living space has given me lots of big projects to write about.  There have been lots of big tasks to accomplish.   I don’t write about them near as much but also, behind this are a ton of little things.   The little thing project list is lots longer and might never be completed.  But this week’s post I am going to cover a few of these instead of the big ones.  Just like the project list, this post is going to be longer than average.

First off I want to tell you about a what should have been a little job.  I say should have been, because though it should have been a fairly quick little job, it took hours.   

My van is a cargo van.  So when it was built, all the wires (referred to as a wiring harness) going to the tail lights, blinkers, etc. were run on the surface of the frame.  This is opposed to, in the passenger version of this same van where they are run out of site.  Inside the upper frame.   My van is all about, “who needs to look nice?”  The cargo doesn’t care if there is a bundle of wires going across the ceiling.  This is I suppose a time saver for the manufactures, since they are building hundreds of thousands of them.  For me though it has created a dilemma.  I have been going back and forth about if I want to take the time and effort to move them inside the frame.

Wrapping tape around the offshoots will
keep them from snagging as you pull.
Pulling wires through the frame is a task fraught with cut fingers and torn skin.   Many of the edges inside the access holes of the frame are quite sharp.  Even the places where they aren’t that sharp, by the time you’ve wedged your whole hand in there to grab hold of a wire which is, dammit, just barely at your finger tips…    You will shed blood. 

The reason to more the wires is it will make it much easier to fit the trim.  But, the downside, the odds of screwing something up and suddenly the tail lights don’t work any more are quite high.   What I ended up doing was a combination of both.   Now that I am done, sitting here on the safety of this barstool, I really have to confess I have created the worst of two worlds.   

What I (stupidly) decided to do was not bother with the long run of wire going down the side of the van.  I only changed the wires going across above the back doors.   The reason for this decision was because I already had several wires run inside the frame going down the kitchen side of the van.   I was worried the harness wires would get entangled with my new wires and I wouldn’t be able to get them free.   In hindsight, because of how I taped the harness wires up, I don’t think this would have been likely to happen.  But it was certainly still a possibility. 

The vent behind the tail lights, once I got
it broken out of it's home.

The problem with the decision I made was with the wires outside the frame on part and inside in the next part I lost about three inches of total length.  I shouldn’t be surprised, again because the manufactures are building hundreds of thousands they make the wires *exactly* the length they need.   There isn’t much slack to give and getting everything hooked up again after losing that three inches was really tough.

Here is what I did.  This seemed like a four handed job again so I enlisted The Wife’s help.  I unhooked the harness from the brake & tail lights.  Pulled it through to the drivers side.  I actually own a fiberglass fish-tape but didn’t have it immediately available.   I just used a length of 14-3 wire that I poked through the frame from the passenger side to the drivers side, above the back doors of the van.   I hooked the wire up to the harness.   Then I applied tape around each of the harness connectors and strapped them tight to the harness itself.   Using this tape I was also able to taper some of the square corners of the connecters so they wouldn’t snag on the frame or other wires.  Doing this taping is what would have made it so I wouldn’t have had to worry about snagging if I had decided to the long run up the side of the van, but I didn’t know that at the time.

Once the vent was pulled out I had access to
the wires in the channel inside.

Getting the wire pulled through the frame was tricky and difficult.   I should have used the fish-tape rather than the wire, that would have made it easier because it would have slide through the tight areas whereas the wire wanted to catch.  Then in the end, we came up short.   There was enough harness length to barely plug in the connectors, but not enough to really reach them well or to get the anti-snagging tape removed.   I fought and I struggled.   My hands got all chewed up from reaching in the holes of the frame trying to move the wires along or get the tape unwrapped.   

In the end I had to go outside the van and remove the passenger side tail light assembly and the trim.  Then I had to break out the rear internal frame vent so I could get my hand inside the space to access the wires.   It totally sucked.  All in all it was about a three hour job.  Not fun at all.   For now I just covered the vent hole with tape.  I don’t know if I will buy a new vent or not.   I really can’t tell you if this project was worth the effort or not.

The LED light pods attached to the underside of the bed.
Each of these plastic pods contain four bright LEDs.

The next project was totally worth the effort and is going to be great.   I think I have mentioned (maybe in a need to keep this normalized) I have named spaces within the van.   Sure, I only have 63 square feet.  But I still refer to areas within that space with names.   I have the kitchen, the bedroom, the dining room, the living room.  I even have what I refer to as the garage.   That’s the space under the bed where the batteries and propane tanks live.   So my next project is to add lighting to the garage.   

I used what on Amazon Prime are called (12V 40 LEDs Van Interior Light Kits, Ampper LED Ceiling Lights Kit for Van Boats Caravans Trailers Lorries Sprinter Ducato Transit VW LWB)   These are ten little square pods of four LEDs all wired together.   I cut the wires between most of the pods so I could spread them out further.   I spliced in longer sections of wire and put heat shrink tubing around the joints to keep it all tidy and dry.   Not a big job, just make sure you keep track of the positive/negative wires and don’t mix them up.  These lights are AMAZINGLY bright.   They seem to draw very little current and the ten of them light up every inch of my garage space.   Very much worth the fourteen dollars I spent on them!  I bought another set which I am thinking I will wire into the cab some day.   I will be able to light everywhere.   Under the seats, under the dash.   All of it lite up at the flip of a switch.   

The garage, all lit up!   This area subject to needing to
work on things, now I am going to be able to see what
I am doing!  This project turned out great!

Speaking of LEDs, I like my color changing mood lights in the bedroom area of the van so much I am going to run a separate string of them in the kitchen area.   I have the bright puck lights mounted into the ceiling but wow are they bright.   Sometimes I just want enough light so I can see what I am doing without being blinding.   What I am going to do is run a length of LED above the countertop, but then I also bought some six conductor extension wire, so I will hook a strip of these lights under the table as well.  I can’t really put the lights in place yet because I need to get the trim installed.   But I got the six conductor wire run in the frame and I got the light controller mounted in the kitchen side of the floor to ceiling shelf.

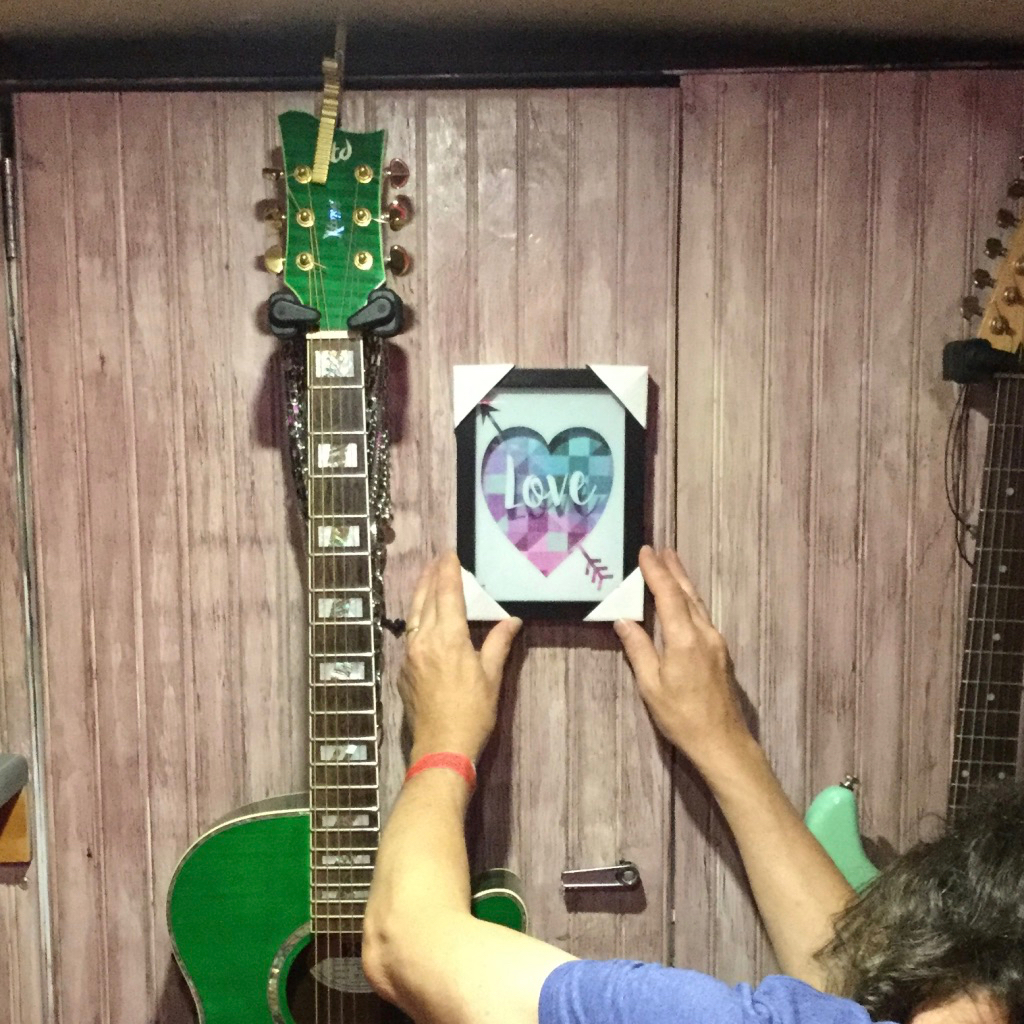
Gluing the bulkhead door plywood onto the
door.   Because of the way the door is built,
there is nowhere to attach screws.  So it is only
held by the glue and a guitar hanger base.
I got a step further on the main bulkhead project.  First I took a six inch wide strip of the blackout shade material and fit it to the gap on the hinge side of the bulkhead door.   I had to cut out the areas for the hinges.  I ran the fabric through the gap on the hinge side.  I taped it to the insulation on the inside, and to the bulkhead steel in the cab behind the drivers seat.   With this fabric in place there is no more light leakage.   No more bright strip of light inside the cab and causing a loss of stealth.   Once this fabric was in place I cut out the size of the door from the sheet of bead-board plywood and affixed it into place.  One step closer to having the bulkhead finished!  Very cool!

I bought a second battery level gauge.   I have one already in the garage because it was nice to know how much juice the batteries have in them when plugging or unplugging from shore power.   But all the rest of the time when I am living inside, having the gauge only back there sucked.   I couldn’t read it and my work around was to lean over the bed and hold my camera down there to shoot a (usually out of focus) picture of it.   The second gauge I wired into the top of the floor to ceiling shelf.   What I didn’t realize is just how bright that little sucker is.  It lights up the whole van when I am trying to sleep.  So, going to have to figure out something there too.

The toilet docked in its bay.

I built the plywood base for the toilet.   My original plan was to mount the toilet to some plywood that would slide out for use.   Thinking more about this and how sturdy the toilet is built I decided to just cut out that step.  What I did instead is cut a chunk of 3/4 plywood to fit the space, then I set the toilet in place and marked the base of it.  Then, I cut that section out as well and placed felt furniture moving pads on the bottom of the toilet.   Now it sides in and out and nestles into place when it is stored.  It seems heavy enough to not really slide around when I am going down the road unless things get really violent.

To get the vent holes to line up I marked the centers on the bulkhead wall.  Then, I transferred those marks to the plywood when I had it in place.   I drilled out the holes oversized by a quarter inch.   That way there is a little room for discrepancy.   Plus, I thought it wouldn't hurt to have a bit of a ledge there. 

Use a round object to trace
curved profiles.

One last small project.  I built the bulkhead for under the kitchen counter.  The one that separates the kitchen storage area from the toilet area.   This is built out of 3/4” plywood because I wanted it strong enough to support several drawers.   The first part was really easy, cutting it to the right height.   Everything is (surprisingly) level and square so it was just a matter of measuring and cutting.   Then I slid it into place and used a round object —I used the cap from a jar of honey :-) to mark the curve of the side wall onto the plywood.  Something round works much better in a case like this.  Just make sure you are marking the point furthest from the outer wall.  When you are done marking, slide the cap up and down to make sure you can see your pencil line the whole way.  If your mark disappears at any point, you need to re-mark it. Once the line is drawn and confirmed, I cut the curve, then fit the plywood back in to mark the cutouts for the wire passage and trim holding the back of the counter.  For now I just taped this plywood in place using some aluminum tape.

The under counter bulkhead
in place.

A project for the future is going to be figuring some way to tighten the hinge screws for the bulkhead door.   When I took it apart to cut the door off, I should have put it all back together with thread lock.  I didn’t though and now over time and miles the nuts have vibrated looser until the door has quite a bit of play at the bottom.  The nuts are sealed in place by the bulkhead plywood though and I can’t get at them to tighten them up.   They just spin.   I am thinking maybe I can drill some small holes and then use a nail through the hole to keep them in place.   I have to think more about this though.


I guess the good news is it's only flat
on the bottom.

If you don’t remember it, and I would be surprised if you did, I was talking this spring about a particular flare fitting on my gas lines.   I was having trouble with leaks and I couldn’t get it to seal.   Back at that time I heard about putting oil on the threads of the flare and some thread lock on the actual surface of the flare.   Well, some time has passed and that fitting seems to still be tight.  Of course, the first step would be to take the fitting apart first and see if you can determine why it isn’t sealing.  But if you don’t come up with anything I am going to call this a cure and recommend it as a fix if your joints don’t seem to seal.  

I don't know where y'all store your spare drywall screws.  I guess I store mine in my tires.  

Thursday, October 12, 2017

The B.V.


Number Two Son doesn't normally get involved in naming things in the household.  That duty is officially covered by The Wife my very own ICANN.   Secondary, and usually unofficial naming, nicknames and the like, fall to Number One Daughter who started this practice not long after she began to talk.   The rest of us just have to follow along.  So it was from this unlikely source the family has adopted a name.   He started calling my project “The B.V.” (Big Van) and it seems to have stuck with the rest of the kids and family. 

At this point in the project I have had the countertop and the sink in place for a month or so now.  I even got the drain hooked up a while ago, so I can brush my teeth via bottled water.   In a way, it is interesting each step I take, makes it so much more civilized than it has been.  I feel those things.  So, is it optimal to be using a bottle of water to be cleaning my teeth?  No.  But damn, it was so much better than it was before, I can move on to other projects for a bit.  --Like that fan I just put in.

The other thing, quite honestly, this step costs some money.   $75 for the pump (SHURflo 4008-101-E65 3.0 Revolution Water Pump)  I needed a fresh water tank for $61.  I chose a ten gallon (Custom Roto-Molding L1A RV Fresh Water Tank).  I think that is plenty of water to be carrying with me.   I decided to spend a little extra and get a $42 Pressure tank (SHURflo 182-200 Pre-Pressurized Accumulator Tank) and with it a pump silencing kit  (SHURFLO 94-591-01 Pump Silencing Kit) for another $26.  So total for the project, not counting all the surprises is a bit over two hundred. …And in case you hadn't already noticed, there are always surprises.
I use just a regular switch and wire to
it the 12 volt lines.

Then one Friday payday came and their hadn’t been the rush of disasters running a family of five normally entails.  I had the money.  The main parts came from Amazon Prime.  To put together this whole thing, I also used some bits I had on hand and there was at least two trips to the hardware store. …Because no project worth doing can be done in less than two trips to the hardware.

This particular project sort of crosses over a whole bunch of disciplines, starting with the electrical system.  I knew I wanted a switch near the faucet to control the pump.  The pump is on the 12v system and it should have it’s own fuse.   I used one of the runs of the 10-3 wire I pushed through the frame up to this spot back in the very early days of this project.

I cut a hole through the side of the floor to ceiling shelf.  Into that I hooked on one side of the switch one of the wires from the #10 wire.  On the other side I went to a red 12awg stranded wire and ran that wire to the area of the sink.  At the same time I ran hooked a black twelve gauge wire to the ground bar on the floor to ceiling shelf and ran that wire also to the area roughly where I thought the pump would be.

The life saver!  The ability to pull out the
sink while working on this stuff.

Back when my friend Craigie was helping me install the countertop and drop in the sink, I was very eager to glue the sink in.   But his advice to me was not to do it yet.  I realized in this project what he was talking about.   He told me, “when you install the rest of that plumbing, in this tight of space, it could be real handy to be able to pull that sink out.”  He was totally right.  It would have majorly sucked to attach the pump for sure.  But the whole rest of the job would have been more difficult.  I even say that including the fact, during disassembly, having the trap from the sink slip out of my fingers and dump all over my lap and the floor.   Even including changing pants it was less work to pull the sink to work on that plumbing.  Thanks Craigie.

I mentioned earlier about spending a little extra money for the pressure tank.  I think that's money well spent.  The way this works is the pump has a built in pressure switch.  It pumps the water up to a certain pressure and then it turns off.   Now, you open up a faucet, the pressure drops pretty quick.  But, the pump takes a second or so to wake up and start pumping.  In that time, the pressure has dropped quite a bit.  Your eye sees this, the brain kicks in, and automatically your hand turns up the faucet more to get the water output the brain wants.  But now, the pump is starting to come up to speed and starts really pumping some water to built the pressure.  What happens is suddenly you have way more water coming out of the faucet and splashing around than you expected.  You can train yourself around delay this splash causing situation but it is irritating when you forget.

This whole problem gets cured when you add a buffer tank.  This is a little tank with a thick rubber balloon inside it.  Pump air into the balloon a couple of times a year to pressurize it.  The ballon maintains the pressure in the waterlines giving the pump time to come up to speed.   Rather than the surprise splash, it is just like the kitchen sink at home.
The parts tacked into place and the wires
hooked up and ready to test.

The first step is to set your major components in place. Water weighs eight pounds per gallon and so I potentially had a dense eighty pounds which needed to be secured to something.  I really only had two attachment options.  I could strap it to the furnace enclosure, but case of in the high g-force event, such as locking up the brakes to prevent impact, I couldn’t say what would happen.   I didn’t want this weight breaking my furnace and it’s accompanying propane line free inside the van.  Something like that could make it more enjoyable to have just hit whatever jumped out in front of me.

Really that was the only other option. I knew where the water tank had to sit.  It had to be strapped to the floor to ceiling shelf.  That is the strongest wall outside of the bulkhead wall. 

I bought a pump that was self priming.  The ones that are not specifically labeled self priming are instead known as gravity priming must sit below the water tank.  You need gravity or a hand pump to prime (or initially fill) the pump with water.   Gravity priming pumps are in general slightly less susceptible to damage from freezing and much cheaper to purchase.  But I felt this design was far too limiting because it locked me into where the pump had to sit.   A self priming pump can sit anywhere vs only below the water tank.  My pump ended up directly above the tank.  That placement couldn't have been done with a gravity pump.

But it was this mounting of the water tank that determined where everything had to sit.  Once the water tank’s home was firmly established.   I tried the pump in a few different spots.  I just wasn’t feeling it until I put it on the floor to ceiling shelf wall up above the tank.  I think having it on this more solid wood wall, rather than the thin plywood of the side walls, should make for a lot less radiated noise.

The pump has some rubber footies that I ran some two inch drywall screws through.   The pressure tank had the same.  Thinner plywood on the outside wall I used some 1-5/8ths.  Getting the pipes all run and tightened down was difficult.  I ended up with some loops.  I guess that is supposed to reduce radiated pump noise.

Down there you can see the three-way
elbow.  A plumbing first for me!

To the fresh water tank itself I wanted to use ridged pvc pipe.  I’m not really sure why.  I guess I just have a deep mistrust of the flexible hose and it’s connectors.  Maybe having actual pipe makes it seem more like home. :-)  I don’t know.  I only needed a couple of feet and as The Wife always reminds me, I never throw anything away.   I already had some of the straight sections of pvc in stock, left over from a plumbing project on my house a few years ago.  It took a trip to the hardware store to purchase a 1/2” pvc three-way elbow.  I have to confess this is a bit of a specialty part and the first one I have ever used.  Basically, this is a T connector that is also a 90 degree elbow.  I wanted the water to come out of the tank and either go to the right to a valve which if opened drains to the ground, or up to to where the pump is going to be attached.

I ran the pvc pipe up to about the top of the tank where it changed to flexible reinforced plastic tubing.   The reason for not tying the pump to the hard plumbing was vibration noise.   The plastic tubing takes the vibration out.   The pipe attached to the pump, and then the buffer/accumulator tank.  I initially attached the pump to the wall and then was trying to attach the supply lines to it.  I ended up removing it from the wall, hooking the lines up while I could better line things up, then reattached it.

The pump and buffer tank with the sink removed.
The section of pipe heading off to the floor drain I screwed down to the sub floor and in one section put some PL-200 construction adhesive alongside the pipe.   I drilled a hole down through the floor and mounted the pvc pipe into that hole with expanding foam.

The system as I have built it, to a home builder, looks fatally short of valves.   True, this isn’t like a home where you have a valve in front of and behind everything to facilitate repairs without shutting off all the water.   This project is a little different than that.   It is just so much smaller there was no need for all the additional cost and complexity.

It was a happy moment, that first night.  Living in a van that now had running water.

Thursday, October 5, 2017

It's Only Fair


Being away from home four nights a week I am always on the scout for things to occupy my time.   A concert here and there.  An iMax 3D theater movie.  A long public transportation trip to get to a far away sandwich, just to burn up some hours.   Of course the last few months, working on this van, I don’t have as may of those hours to burn.  Don’t think it escapes me it’s possible this is one of The Wife’s motives.   I get in less trouble when I am busy.  But even with my long project list, sometimes I need a little break from the van.  That’s when I am fitting in these concerts, movies and sandwiches.  The thing is, I don’t often I have anything span more than one night.

That all changed though.  The State Fair has come to my big city.   Just to the north of the midway, they have their very own campground!  As soon as I heard about it I knew I had to do this.   I had to put in a camp site reservation way back in May.  The sites sell out in hours so I had three different types of calendar reminders for the opening of sales.  When the hour came up, 10AM on a Thursday, I was busy hitting reload on my browser.  I felt like that time I was trying to get Stones tickets.   The second the sale was open, I registered for a site.

It was cool, having something like this to look forward to the length of a summer.  About a month before fair-time I invited The Wife to join me.  I thought she would maybe do it for a night, two at the most.  She was somewhat noncommittal when I asked her.  But in the interceding time we got the week long sans-kids camping trip.  We got another shorter camping trip with the whole family, the rest of the members all snuggled in their tents.  The two of us sipping scotch as we relaxed on our  wonderful soft mattress.  We were accustomed to having great times and marvelous adventures in the van.  By the time of the fair, she joined me four of my five days.   It was great!  I went to work every day via public transport, then back to the fair each night.  We had a fabulous time wandering around, eating, and people watching.  I think her phone registered nine miles one day.  We literally walked through our feet in the span of those days.  I had one extra night pre-paid for my camp site.  My feet said “go home.”

I was really surprised by was the value for the money I got from the food venders.  I just remember fair food of years ago.  Greasy gut bombs that about killed you.  The prices were high and portion sizes small, the only real flavor was fry oil.  I felt like that was the biggest change of the entire fair.  I thought the food this year was pretty amazing.   Everything I had was very flavorful.   Even the food I love the most, the cheese curds in the food building.  The amazing thin batter.  Salty on the surface.  Not too melted on the interior.  They were perfect.  I had them every single day.

We had fish tacos one night.  She had a gyro one day for lunch while I was at work and proclaimed it fantastic.  Fresh cut fries, great burgers.  I just can’t get over how pleased I was with the quality and value for the money of the fair food.    Compared to normal city prices, fair food was right in line.

…Don’t get me wrong.  I ate mini donuts too.

In addition to all the daytime fair walking, we are nighttime walkers.  I don’t know if y’all realize it or not but, just like looking from your kitchen window and seeing someone walking their dog by your house at two in the afternoon…  There are people walking by at two a.m. as well.  Several times over the years The Wife and I have been driving around town in the daytime and be surprised at the color of a house.   Purple?!  —We had only seen it at night, we thought it was grey!  Let me clue you in on something.   Fairgrounds get weird after midnight.   That’s even coming from a guy who has a pretty high bar constituting weird.  I’ll say no more.

As far as van life, there were about four of us camper vans there.  Plus one cute little pull behind trailer camper.  Seriously, it was just too cute for words.  I’m guessing they had a third less square feet that what I have.  Built in the late 70’s in all it’s round cornered fiberglass glory.    I talked to the owners a bit.  They lived in the even colder, next biggest city to the north.   A young couple with a little baby.  Down for a week that spanned the previous weekend.

They really do look a lot alike.  I never even noticed that
big dent in the front fender until now.
There was one other stealth white van.   I talked to that lady the third day.   I really felt I had to.  You know how it is.  Coming out of the bathroom late at night.  Eyes lock onto a white van.  They really do look all the same.   Lucky in a way, I decided I should grab a bottle of water from the cab and decided to do it via the front passenger door rather than through the bulkhead.    Even when the mind said “key hole seems lower than I remember it being…” I pressed on.   The key wouldn’t fit.  I jiggled it around some, trying to get it into the lock.  Puzzled, I took stock of my surroundings and realized my error. 

So I had to apologize to her the next day.   She was a fair worker who travelled from state to state.  Nice Ford stealth van with the bed setup along the side.  She said she was a sound sleeper and hadn’t heard a thing.  I hope she was sleeping just as soundly two nights later when I nearly did the same thing again.  What an idiot.

I talked to another guy who was driving a dark grey windowless Sprinter van.  God would it be nice to be able to stand up.  This van was the model with the lowered floor so it really didn’t even seem very far off the ground.  Bed across the back and a very small kitchen area.  No real storage.   The center of his van life seemed to be the front passenger seat that could swivel to the back.

The feet of a Keens wearing fair girl!
Otherwise the campground was filled with your typical mix of money oozing gas guzzling buses and seen better days antiques.   Each of us parked just a touch over seven feet apart.  The guy who helped me park told me to be very careful and even ask him for help again should I pull out of the campground and come back.   The fire marshal often makes surprise nighttime visits.   Best time to catch everyone home in their campers at a fairgrounds campsite?  3am.  They have a seven foot long stick.   If they can’t walk it between your campers they wake up both vehicles and sort out getting them moved.  The guy encouraged me to not be involved in such a scene.  I let him know once I was parked I was settled.

The fair was a great time and I can’t wait to do it again next year.   Being right there, with all that entertainment right at our fingertips we found to be lots of fun.  In our van we had the perfect way to do it!

Tuesday, October 3, 2017

Keeping'r Cool - Roof Vent Edition


This was another one of those crazy moments.  I was poised to cut a fourteen inch square hole in the roof of a vehicle I just purchased.  Maybe this is commonplace to some people.  I am sure there are people out there who think the same of me as I was thought about The Wife, a couple of stories back.   She had never been under a car before and I was incredulous.   Yet here I am, with this surreal feeling, my jigsaw poised above the steel of my roof.   Am I really going to cut this big hole?

The answer of course was yes.  It is just crazy to be cutting on cars instead of what I had done before which was drive them and change their oil.  To start this task I measured and found the center point (side-to-side) of the ceiling by measuring from each side of the upper frame.  It is tricky. You have to account for the curve of the roof.  

Drill a hole up through the roof at each
corner.
What I did is take a rough draft measurement from side to side.  Divide by two.  I then marked that point, being much more careful with the tape.   By doing this, you are working with a shorter distance.   The tape is shorter, there is less to keep track of when bending the tape to conform to the roof curve. One you have marked this point from each side (don’t worry about your marks not being in the same spot --they won't be) you divide this distance between your marks and mark just between them.   This is the best way I have found to find the center of an odd curve.

The fan wants a 14” square hole but it can’t be tight.   What I did is measure out from that center point seven and an eighth of an inch.   That would give me a quarter of an inch of play in case I can’t quite cut a straight line.  I measured a couple of inches back from the frame member and marked a line.   Eventually I had a 14-1/4” square drawn on the ceiling of the van.  With a five-eights inch bit I drilled a hole up through the ceiling at each corner.   Trying to make sure the edge of my bit exactly lined up with the outside edge of the hole I had drawn.   Basically, you want the edge of the hole to mark the lines you have drawn.

From the roof of the van, cutting the hole
marked by the masking tape.
I am going to take a quick aside here.   There is another van dweller who has a really nice video about installing a fan in the ceiling of their van.   I watched it before doing this whole job.   Videos are great and I really appreciate their effort.   That said, they marked the ceiling hole just like I did.  I think my rough draft measurement method is easier for finding the center.  They drilled the holes up through, just like I did.   Then, for whatever reason I can not understand they took a saw and cut the hole from inside the van.  They stressed wearing eye protection and had big goggles on.   But seriously?  They had to be covered with metal chips when they were done.  Totally stupid.

You have the four holes drilled.  You know where you need to cut.   Move to the top of the van.  Recreate your lines, drawing from the outside edge of each hole.   I then use blue masking tape going from hole to hole to protect the surface of the van paint.  Once I had the lines marked and the tape all in place, wearing some simple safety glasses and breathing the fresh clean air, I was able to cut the hole without a rain of metal shavings accumulating in my hair.  This is a vast improvement on their video.

The dome light frame when I thought
it was nearly removed.  I suppose I only
had another twenty minutes of beating
and cursing at this point!
This next bit really sucked.  I wanted to place my fan as far forward as I could.  But there is also a structural member going across the ceiling there.   So I had kept my hole cut back from that about an inch. Where I cut was right above the stock dome light mount.  That mount had to be removed.  Should be easy, I figured.  Five little spot welds.   Those can’t be that strong, can they?   As it turns out they are quite strong.   Amazingly-holy-shit-Jesus-in-a-sidecar, strong in fact.   I figured first I would just run a steel chisel in the gap and pop that rascal right off’a there.   That didn’t really pan out at all.  So then I drilled out the spot welds, figuring that would have to do it.  Including one really scary moment where the drill caught and I thought I had just drilled through the roof of the van.   —That would have been outstandingly bad.  But luckily that had not happened.

Even after I drilled it out it took maybe an hour of pounding and swearing to get that mount off of there.  It was crazy.  I couldn’t believe how strong that weld was. But finally I got it down to the point it was only held in one spot.  I was able to bend it back and forth a whole bunch of times and it came loose.  Finally!  

If you do this same thing some day, at a certain point you are going to be where I was.   On the roof of your van, looking down inside it, though this huge hole.   No matter how many times I measured it, I reached this point and my only thought was “what if I did it wrong?”

The roll of butyl tape as it came from
Amazon Prime.  Totally un-crushed!
I hadn’t!   I dropped the fan in for a test fit.   Everything was golden.  The next step involves one of the harder materials gathering aspects of this whole phase of the project.   What you need to find is one inch pure butyl tape.   I guess you can find it at RV repair shops.   That’s what the internets told me anyway.   But whoever wrote this must have been surrounded by much more accommodating RV shops than what I am.  I called the three that are here in my big city.  Yes they had it.  No, they wouldn’t sell any to me.  
I eventually found it on Amazon.com but the reviews are very mixed.  In the end, I think it was a matter of luck of the draw.   The tape is very susceptible to being flattened if it is warm.  If you get one from the bottom of the stack on the shelf it can be quite mashed.   I got lucky and maybe mine was from the top.  It arrived un-smashed and looking just fine.  The tape is pure rubber and has a paper backing.  I put a double layer of tape all around my 14” hole.   Once the tape was there I dropped the fan in place.  I ran self-tapping 1” sheet metal screws down though each of the holes.   Just run them down until they are tapped.  Don’t screw them all the way down.  Work fro side to side to tighten the fan down to the roof evenly.

When you tighten the fan down to the roof, the
butyl tape should squeeze out all the way around
to ensure you have a good water tight seal.
The fan I installed was the Fan-Tastic Vent 7350 (807350) that I purchased through Amazon Prime.  The price was $268 and it is the most expensive fan the company makes.   The killer feature for me was the fan is rain sensing.  It is right above my bed.   With this unit, I can leave the fan running during the day and know it will close on it’s own if it rains.  I am not going to come home to a wet bed

The fan came with a wireless remote and holder.  I mounted the holder onto the floor to ceiling shelf with a couple of 1/2” drywalls.  Using this remote I am able to control several aspects of the fan.   First off, the fan is two directional.  I can blow either in or out.   With the floor vent I have, I anticipate I will primarily use the fan as a booster to the natural draft.  So I will have it blowing out.  I will have to see what conditions might warrant the reverse.

Second I am able to control the fan speed from barely turning and super quiet all the way up to quite roaring.   The remote also has a temperate gauge on it.  You can set the remote to run trying to keep the van a certain temperature.   I could see this maybe being a handy thing in the hot part of summer.   I will set it for 75 and if it gets warmer than that, turn on and run the fan.  I think that is going to be pretty handy

It is really amazing to me how much of a cool draft I get through the floor vent when the fan is on.  Pulling that cool air from under the van all day long is what is going to make the van sleep-able on a hot summer night.

Total time to install, maybe three hours because of the dome light bracket.   If not for that, it might have even been able to be done in an hour.

Tuesday, September 19, 2017

Living This Van Life

I’ll own it.   It has been a while.  In the frozen northland where I live, summer is a brief time of warmth and beauty.   I have been enjoying it.   But I have been working on the van a lot too, I just haven’t been writing about it much.   There will be plenty of time to write later, when it starts getting dark about four-thirty in the afternoon.  What I have been doing is taking a lot of pictures and I really look forward to bringing you all up to date.  In the meantime, I want to talk about some current events.

What has happened in the world of van life is the trial by fire.  Camping with The Wife.

Every year we go for a week even further north into the frozen wasteland.  This is our sans-kids-week-long-parents-relaxing-in-the-northwoods trip.  An event we look forward to!  Until last year we went on motorcycles.  Rode the twenty miles into town for meals every day.  But then came the flood.   Last year, on the day we were to leave home, the area around the campground got nine inches of rain.  Roads were under water. There was no way we were riding bikes to camp.     We either had to stay home or graduate up to the family mini van.   What are we going to do?   We had to take the van, but it was what happened next… Take a mini van with four motorcycle saddlebags sitting in the back?   Oh hell no!  Load it up!  Once that door was opened, there was no shutting it again.

Our nice little camping spot would not be complete without
flying the pirate flag!
This year we just did it in style.   I mean, we *setup* a tent.  You know, so we’re not the weirdo campsite with just a windowless van sitting in it.  But it was like a disguise tent.  The Wife used it once.   We slept in the van!

Up until this point she had spent two nights, van dwelling with me on work nights.   Then one short weekend trip where we really only used it as a bedroom parked in my sister’s driveway.  So those nights all went fine but this trip was a Tuesday through the following Monday.  More days and less conducive to backup plans.  Don't get me wrong, the place we go is off the beaten path but by no means were we boondocking.  (The practice of being totally off the grid) We had a 30amp electrical connection and could have even had running water if we wanted it.

Under-bed storage boxes with trays.
Still though, we didn't want to be running to town all the time.  Packing up was much more complex than our previous weekend excursion.  It was the first time I was planning on cooking out of the van.  Up there, town is about a half hour drive —it was my goal to not have to make that drive.  We had to pack in enough clothing (and for some reason, we always end up taking a lot of clothing to this event.)  We even took coats because… you know… it is only July.  It could maybe snow or something. <eyeroll>.

I have built some custom storage boxes for under the bed.   They were all full.   Floor to ceiling shelf was full of stuff.   Driving up there, pretty much the whole floor was full too.   I guess I lied.   Once we got there we did use the tent for storage as well.

How my colorless plan has come to have color!
With a trip plan for this many days I decided the time was right to outfit the van as well.   To do so we had intents of traveling the further distance to the big box retail store who’s political stance is more in line with ours.  But as often happens (with us anyway) time got short.  I felt guilty but we had to patronize the evil empire itself for all the plastic storage boxes, curtains, spoons, measuring cups, (bright pink rugs) and spatulas of a living space.  The final bill came to a tad over four hundred dollars.  Certainly more than I expected it would be.   Even then I think a secondary trip was required for an additional fifty.

A great spot to hang a mirror!  She
used the great outdoors as her dressing
room.  The mirror worked great on
the secondary door.
The week’s menu included some grilled salmon sandwiches on a ciabatta bread, bacon cheese burgers on nine grain, some grilled chicken  and on the final day an Indian rice curry.  In the end with the exception of running the rice cooker twice, everything I cooked was on the Weber Smokey Joe grill.  When the legs are off of it this grill just fits between the door and the bed on the back of the van.  Set it up and it proved to be a really great little grill for two people.

In a situation that is typical for the place we live, we had two days where we ran both the furnace and the air conditioning in less than 24 hours.  Because we are still learning, there was a couple hours one afternoon where they ran simultaneously. …Oh well…  But the main thing about both of these systems, was when all those other campers were shivering in their tents, we were warm and toasty.   Two afternoons, where it was not so much the heat as the humidity, we had wonderful cool dry naps.

The vent pipe for the portable AC unit
exactly fits two bottles of water.  I like
things that *just fit*!
The van itself performed almost flawlessly.   There was one exception, and once I figured out what was going on, an easy work-around.  Really it started with me thinking about the fact the fresh water in my ten gallon tank had been in there about a month.  I don’t drink it or cook with it currently.   I do brush my teeth with that water.   Hopefully that isn’t what kills me.  I had run a couple of batches of baking soda water through there.  Letting it slosh around for a couple days before draining it out.  But after draining out the soda water and flushing it a bit, I dumped in five gallons of fresh water and have spent the month using it.

I presume it could get stale or adsorb chemicals from the plastic tank.   Anyway, I drained the water tank using a provision I built in when I did the plumbing.   I have a turn valve on the floor which is connected to a drain pipe.   All I need to do is open it up and the water drains out onto the ground.   I filled it back up and we left home.

Here is the problem.  The pump lost prime. With the tank filter in place it was like there were air bubbles in the system and I couldn't get them out.   It took a while to track down and focus on the filter being the problem but eventually I did.  I pulled the filter out, hooked the pipes back up without it and whadda ya know, it worked fine after that.

The water filter once it is removed.  This filter
is for keeping out sand and big pieces that
might ruin your pump.  It is not for making
water safe or taste good.
For future reference, I think if my filter was below the level of the water tank this wouldn't be an issue.  But it is instead above and it was like the pump couldn't clear the bubbles out of it.  I even pulled the vent plug from the tank and blew into the tank to force water up through the system.  No joy.  So either I need to redesign the pipe system, or do without a particle filter, risking sand getting in my pump.

Otherwise the van functioned perfectly.  We had a great time and met some new friends.  Living the van life was amazing!