This was another one of those crazy moments. I was poised to cut a fourteen inch square hole in the roof of a vehicle I just purchased. Maybe this is commonplace to some people. I am sure there are people out there who think the same of me as I was thought about The Wife, a couple of stories back. She had never been under a car before and I was incredulous. Yet here I am, with this surreal feeling, my jigsaw poised above the steel of my roof. Am I really going to cut this big hole?
The answer of course was yes. It is just crazy to be cutting on cars instead of what I had done before which was drive them and change their oil. To start this task I measured and found the center point (side-to-side) of the ceiling by measuring from each side of the upper frame. It is tricky. You have to account for the curve of the roof.
 |
Drill a hole up through the roof at each
corner. |
What I did is take a rough draft measurement from side to side. Divide by two. I then marked that point, being much more careful with the tape. By doing this, you are working with a shorter distance. The tape is shorter, there is less to keep track of when bending the tape to conform to the roof curve. One you have marked this point from each side (don’t worry about your marks not being in the same spot --they won't be) you divide this distance between your marks and mark just between them. This is the best way I have found to find the center of an odd curve.

The fan wants a 14” square hole but it can’t be tight. What I did is measure out from that center point seven and an eighth of an inch. That would give me a quarter of an inch of play in case I can’t quite cut a straight line. I measured a couple of inches back from the frame member and marked a line. Eventually I had a 14-1/4” square drawn on the ceiling of the van. With a five-eights inch bit I drilled a hole up through the ceiling at each corner. Trying to make sure the edge of my bit exactly lined up with the outside edge of the hole I had drawn. Basically, you want the edge of the hole to mark the lines you have drawn.
 |
From the roof of the van, cutting the hole
marked by the masking tape. |
I am going to take a quick aside here. There is another van dweller who has a really nice video about installing a fan in the ceiling of their van. I watched it before doing this whole job. Videos are great and I really appreciate their effort. That said, they marked the ceiling hole just like I did. I think my rough draft measurement method is easier for finding the center. They drilled the holes up through, just like I did. Then, for whatever reason I can not understand they took a saw and cut the hole from inside the van. They stressed wearing eye protection and had big goggles on. But seriously? They had to be covered with metal chips when they were done. Totally stupid.
You have the four holes drilled. You know where you need to cut. Move to the top of the van. Recreate your lines, drawing from the outside edge of each hole. I then use blue masking tape going from hole to hole to protect the surface of the van paint. Once I had the lines marked and the tape all in place, wearing some simple safety glasses and breathing the fresh clean air, I was able to cut the hole without a rain of metal shavings accumulating in my hair. This is a vast improvement on their video.
 |
The dome light frame when I thought
it was nearly removed. I suppose I only
had another twenty minutes of beating
and cursing at this point! |
This next bit really sucked. I wanted to place my fan as far forward as I could. But there is also a structural member going across the ceiling there. So I had kept my hole cut back from that about an inch. Where I cut was right above the stock dome light mount. That mount had to be removed. Should be easy, I figured. Five little spot welds. Those can’t be that strong, can they? As it turns out they are quite strong. Amazingly-holy-shit-Jesus-in-a-sidecar, strong in fact. I figured first I would just run a steel chisel in the gap and pop that rascal right off’a there. That didn’t really pan out at all. So then I drilled out the spot welds, figuring that would have to do it. Including one really scary moment where the drill caught and I thought I had just drilled through the roof of the van. —That would have been outstandingly bad. But luckily that had not happened.
Even after I drilled it out it took maybe an hour of pounding and swearing to get that mount off of there. It was crazy. I couldn’t believe how strong that weld was. But finally I got it down to the point it was only held in one spot. I was able to bend it back and forth a whole bunch of times and it came loose. Finally!
If you do this same thing some day, at a certain point you are going to be where I was. On the roof of your van, looking down inside it, though this huge hole. No matter how many times I measured it, I reached this point and my only thought was “what if I did it wrong?”
 |
The roll of butyl tape as it came from
Amazon Prime. Totally un-crushed! |
I hadn’t! I dropped the fan in for a test fit. Everything was golden. The next step involves one of the harder materials gathering aspects of this whole phase of the project. What you need to find is one inch pure butyl tape. I guess you can find it at RV repair shops. That’s what the internets told me anyway. But whoever wrote this must have been surrounded by much more accommodating RV shops than what I am. I called the three that are here in my big city. Yes they had it. No, they wouldn’t sell any to me.
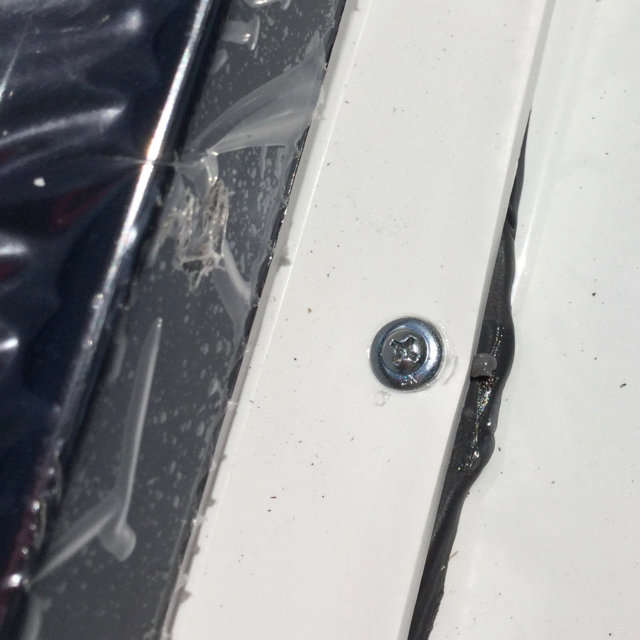
I eventually found it on Amazon.com but the reviews are very mixed. In the end, I think it was a matter of luck of the draw. The tape is very susceptible to being flattened if it is warm. If you get one from the bottom of the stack on the shelf it can be quite mashed. I got lucky and maybe mine was from the top. It arrived un-smashed and looking just fine. The tape is pure rubber and has a paper backing. I put a double layer of tape all around my 14” hole. Once the tape was there I dropped the fan in place. I ran self-tapping 1” sheet metal screws down though each of the holes. Just run them down until they are tapped. Don’t screw them all the way down. Work fro side to side to tighten the fan down to the roof evenly.
 |
When you tighten the fan down to the roof, the
butyl tape should squeeze out all the way around
to ensure you have a good water tight seal. |
The fan I installed was the Fan-Tastic Vent 7350 (807350) that I purchased through Amazon Prime. The price was $268 and it is the most expensive fan the company makes. The killer feature for me was the fan is rain sensing. It is right above my bed. With this unit, I can leave the fan running during the day and know it will close on it’s own if it rains. I am not going to come home to a wet bed
The fan came with a wireless remote and holder. I mounted the holder onto the floor to ceiling shelf with a couple of 1/2” drywalls. Using this remote I am able to control several aspects of the fan. First off, the fan is two directional. I can blow either in or out. With the floor vent I have, I anticipate I will primarily use the fan as a booster to the natural draft. So I will have it blowing out. I will have to see what conditions might warrant the reverse.
Second I am able to control the fan speed from barely turning and super quiet all the way up to quite roaring. The remote also has a temperate gauge on it. You can set the remote to run trying to keep the van a certain temperature. I could see this maybe being a handy thing in the hot part of summer. I will set it for 75 and if it gets warmer than that, turn on and run the fan. I think that is going to be pretty handy
It is really amazing to me how much of a cool draft I get through the floor vent when the fan is on. Pulling that cool air from under the van all day long is what is going to make the van sleep-able on a hot summer night.
Total time to install, maybe three hours because of the dome light bracket. If not for that, it might have even been able to be done in an hour.


No comments:
Post a Comment