
I am in my favorite environment tonight. Sitting in a bar. This one is the new bar in our little town. It has that clean swept shopping mall look to it but at least the beer is cold. Off across on the other side of the room The Wife is Scoutmastering her monthly committee meeting. She spends a couple of hours with her board, planning the month ahead. I spend a couple of hours drinking beer and telling a tale to all you fine folks. Seems like a pretty equitable way to spend a Sunday evening.
Everyone is likely tired of me talking about my floor. It is however amazing. I was able to get three coats of linseed oil on it this summer. In the fall I really wanted to follow up and get several more coats on. I even cast around to all my former landing spots. I was checking to see if I could use the couches and bedrooms from my couchsurfing days. I was thinking if I could put a coat of oil on the floor every night for seven days. I would be well prepared for winter. Every night while the oil dried I could visit my friends, land on their sofa for the night and ascertain whether they were happy to be seeing less of me or not. But in the end it just wasn’t to be. I had to get a bunch of other little things done first. Then some other house projects came up that had to be dealt with immediately and snap, just like that, the weather turned cold. The thought of oiling the floor now is out. Running the furnace in such a confined area sounds at the least flammable and quite possibly even explosive. Unless I can happen across a heated shop for a week I guess I will have to put this project off until spring. I will have to be very careful not to get my floor wet.
 |
| Floor with the first coat of oil on. I haven't seen this much exposed floor on this project before or since! |
One other suggestion about applying linseed to wood floors in particular, I don’t really do a final clean up. I clean the floor after the coarse sanding by sweeping (not vacuum) but I do the final sanding and then I go straight from sandpaper to oil application. This fine dust will press into the cracks between the boards and act as a wood filler. In fact that is why I don’t use a vacuum for cleanup. I don’t want to suck any dust out of the cracks, I want that dust to stay there. It makes the floor a little more impervious to have those areas sealed up. In my case, I had a spot in the burl where there were some small (~1/8”)chip-outs. I pushed a bunch of that sawdust into those spots and over the span of a few coats I think I will be able to nearly level them.
 |
| The control wall of the floor to ceiling shelf with one coat of primer on. |
I heat the oil up before application by warming some water in the microwave then placing a small container of oil inside the hot water. The warmed oil is thinner and soaks into the wood much better than cold oil. Particularly in the initial applications spread a fairly generous coat. Come back in half an hour and wipe up any oil left on the surface. Stop back another hour later and wipe it up again. The first few coats, the hot oil soaks in and disappears pretty quickly so there isn’t a whole lot to even be wiping up. The later coats you will be spreading less oil and wiping up a greater percentage of what you do spread.
One thing I have to bring up in case anyone ever chooses to follow in my footsteps and finish a floor or anything else using linseed oil. A number of years back I purchased an old victorian house in a dual collage town. Refinished the floors before I moved in. I was in the wipe up phase of one of the later coats of oil. Not as much was sinking into this floor at that point and so I was getting a stack of balled up and saturated paper towels in the center of the room. Once a towel wasn’t picking up much I would crumple it and toss it to the middle. This is labor intensive work. During this step I try to work more oil into the logical traffic paths. Hand rubbing the oil in to give the floors in those areas extra protection. I was sitting back for a break from this exertion when I looked over at the stack of paper towels. I did the classic (think of the old RCA dog) tilted head focus on that pile as I said to myself, “Is there smoke coming from that pile?” There was. My first thought was to grab it with my hands and carry it outside. It was of course too hot. I found a metal paint roller pan and kicked the pile of towels into it. The smoke level went WAY up when I did this as it got fresh air and neared full combustion. I hustled it outside.
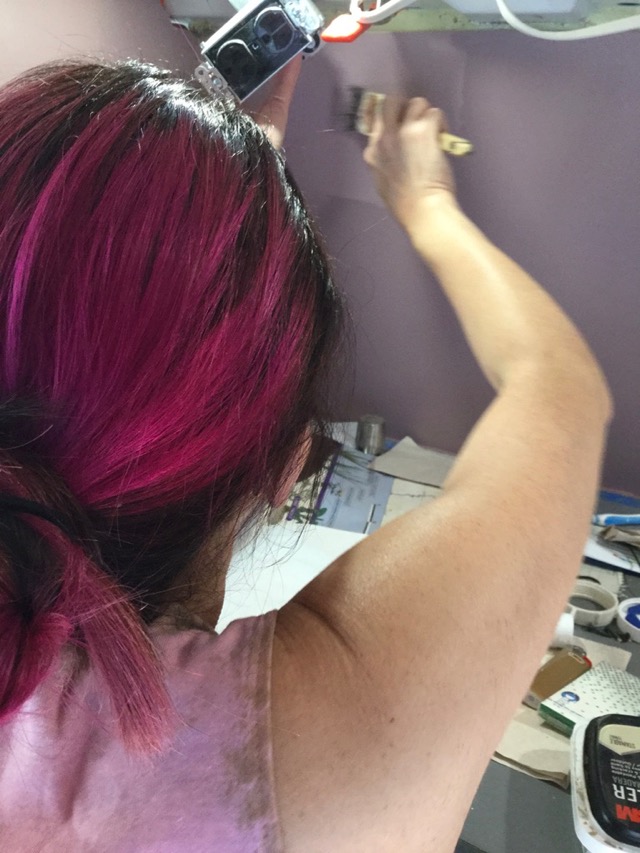 |
| The Wife at work! |
All that fresh oil on the floor, I have to realize I was probably less than five minutes from burning our new purchase down. I swore to myself at that time I would tell this story to every single person I recommended towards using linseed oil in wood finishing. Be careful. The label on the can says oil soaked rags can spontaneously combust. That’s no joke. They can. I have seen it with my own eyes. Now when I use linseed oil, I keep track of every rag. Never let them accumulate. I spread the rags out flat on my lawn for a few hours until they are dry. …Or, two three days until The Wife pesters me, depending on extraneous circumstances.
 |
| The white paint sanded through, with the purple Trans-Tint applied over the top. |
In addition to getting some finish on the floor I also put some on the bulkhead wall. I wanted something looking just a touch rustic with some texture to it. The Wife wanted something colorful. I figured out a way to keep us both happy. I applied some white latex paint to the bare wood. The wood, in this case, is 1/4” pine “bead-board” plywood purchased from Johnny Menard. Then once the paint was dry I used a vibrating pad sander to remove it in places. The look I was going for was sort of worn white wash. Transparent in places but solid white in others. Once I had this look I went back over it with some purple Trans-Tint dye (available through Rockler) diluted in water. The dye soaked in quickly to the areas with bare wood. Darkening those areas and giving them a purple tinge. The areas that still had paint the dye stayed wet and could be removed with a dry paper towel. I left a lot of dye on the white areas to get that a brighter purple tinge. I thought the whole thing turned out looking quite nice. When I was happy with the results I just let it dry for a couple of hours. Then I went back over the whole bulkhead wall with a coat of varnish to protect the color and lock it in. The results were great.
 |
| The purple as it is in the final result. |
These bulkhead results in hand we went to the paint store where The Wife picked out kind of a rose color paint to match for the floor to ceiling shelf and the outside wall behind the kitchen sink. I even got a little bit of work out of her later when I put a paint brush in her hand. In the end it took three coats of color on top of a coat of primer to get the shelves all looking nice.
One thing I was made aware of by the painting process was how my control panel on the back side of the floor to ceiling shelf is starting to fill up. That’s amusing to me because when I first planned this whole thing I was going to put all these controls on a recessed panel. Under that plan figured to build the panel about six inches tall and twenty inches wide to put everything I needed to run the van. But thinking about building this way with a metal panel started to seem like too much work. Wow, was that ever a lucky thing!
 |
| The finished bulkhead wall. |
Here is a problem with globalism and a lack of brick and mortar. Way back in January when I first bought my van I just knew I would be installing the ceiling lights in a couple of weeks when I was all but done with the project. Well lets not go into that whole part. But instead let me tell you about the puck lights I bought from Amazon. They were amazing. A 1/4” thick black solid plastic on the back, silver rimmed on the front. They only use 1.2 watts and put out an amazing amount of light. Well you know the whole story, the van project hasn’t been done in a couple of weeks …Or, I guess even a couple of months for that matter. As soon as I got some wires run I hooked them up. They were my light. But, in the time between purchase and their permanent home been rough. They were living mid project. I stepped on one. I ran a saw into a second one. Broke the connector off a third. But they were great and they were from Amazon so I could always get more. Life is good. I ordered eight more.
 |
| The melted lights held in place now with some tape. |
When the new lights arrived I noticed they were no longer black backed, but silver. Who cares about this stuff right? Very shortly I found out that wasn’t the only difference. The new lights ran hot. Really hot. ...As in, this summer I accidentally left the lights on in the van on a warm day. The lights melted (?!) out of their sockets. It appears all lights are not the same. I hit the repurchase button on Amazon but these new lights are not the same as the old ones. They run much, much hotter. But here I am, I have holes cut in my ceiling to accept a 2-3/8 zero clearance light. That is what I have to fit. Lets tag this, #unhappy
(* It is very important to use boiled linseed oil and not raw. Raw linseed oil will not soak into the wood at all. It forms a skin on the surface so it is like a totally different type of product)
No comments:
Post a Comment